Welcome to our blog! In this post, we will guide you through the process of Configuring V2Ray with HTTP Custom. V2Ray is a popular tool for enhancing your online privacy and security, and HTTP Custom is a convenient way to configure it. Let’s get started without wasting any more time.
Configuring V2Ray with HTTP Custom
Step 1: create the V2ray server
The first thing you need to do is open your web browser, whether on your PC or mobile device. Once you’re there, go to sshocean.com.
On the SSHocean website, navigate to the “Services” section and choose “V2ray.” Now, you might be wondering what the difference is between “V2Ray Vmess” and “V2Ray Vless.” Let’s briefly clarify:

- V2Ray Vmess: V2Ray Vmess is a V2Ray protocol that provides more features and flexibility. It encrypts traffic between your device and the server and allows you to configure various settings, making it suitable for advanced users who want more control over their connection.
- V2Ray Vless: On the other hand, V2Ray Vless, or V2Ray with VMess-less protocol, is known for its speed and efficiency. It simplifies the V2Ray configuration, making it a good choice for users who prioritize speed and ease of use. For this video tutorial,
we are selecting V2Ray Vless because of its speed and simplicity.
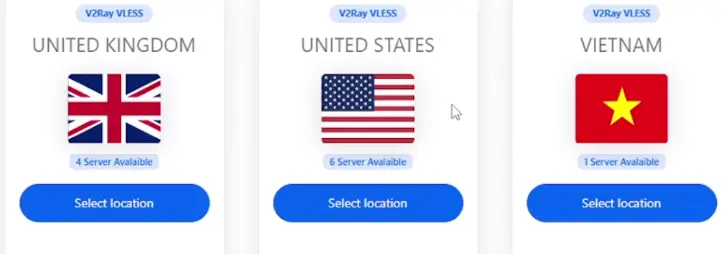
Scroll down on the page and select a server location of your choice. For this example, we’re picking the United States, but you can select any country that suits your needs.
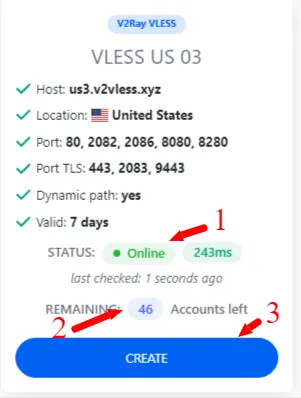
Now, take note of a few things about the available servers. Ensure that the server you choose is online and that there are remaining accounts for you to create an account on. You should avoid creating an account on an offline server.
Step2: Obtain an SNI
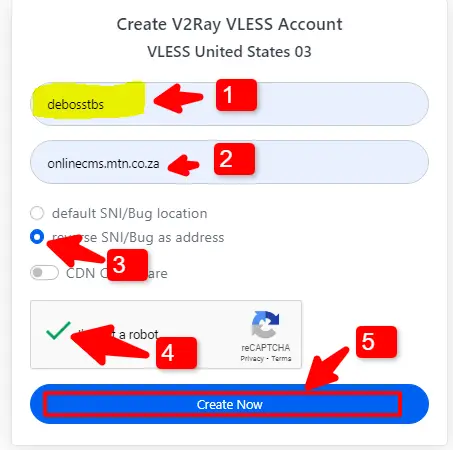
Next, you’ll need to enter a username and an SNI (Server Name Indication). While SNI is optional, we’ll show you how to get one. Click here to generate an SNI for your country. In our case, we’re selecting South Africa. Most of the SNIs on this website are working, but if you can’t find one, you can request an SNI in their Telegram group.
Copy the SNI you obtained from the website and return to the SSHocean website. Fill in your desired username; for our example, it’s “debossttbs.” Then, paste the SNI into the appropriate field. Select “Reverse SNI as address” and hit “Create Now” to create your account.
Once your account is created, you’ll see something like this. Ignore the rest and scroll down until you find “Copy config TLS.” Select this option to copy the configuration.
Step 3: Configuring V2Ray with HTTP Custom
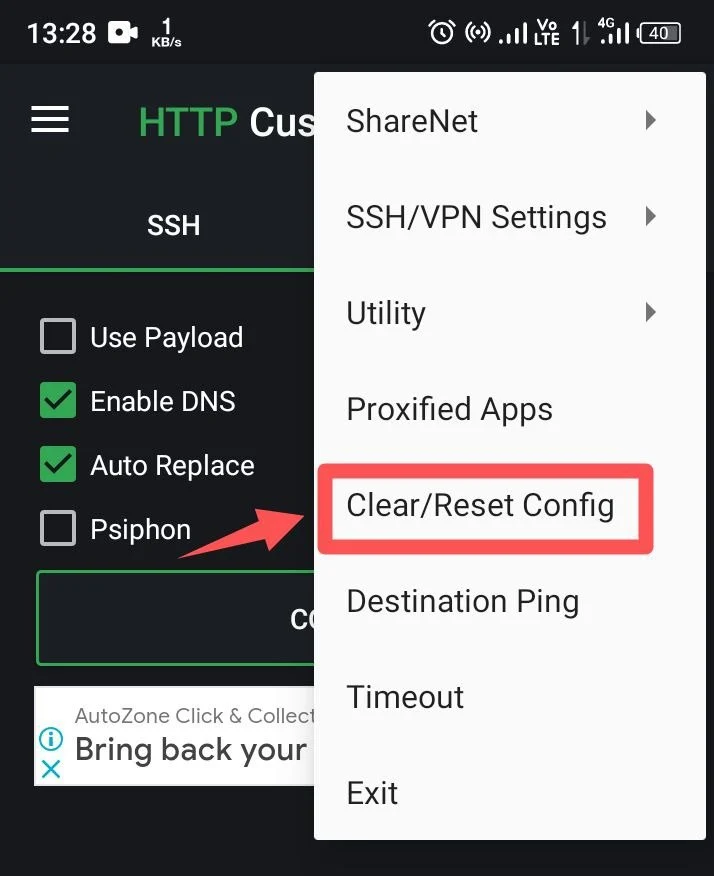
Now, grab your mobile device or the device where you want to configure V2Ray. Make sure you have the HTTP Custom app installed (link provided in the description). Open the app and select “Clear All” to reset the configuration to default.

Choose “V2Ray” from the available options and select “V2Ray Settings.” Paste the configuration you copied from the SSHocean website into the appropriate field.
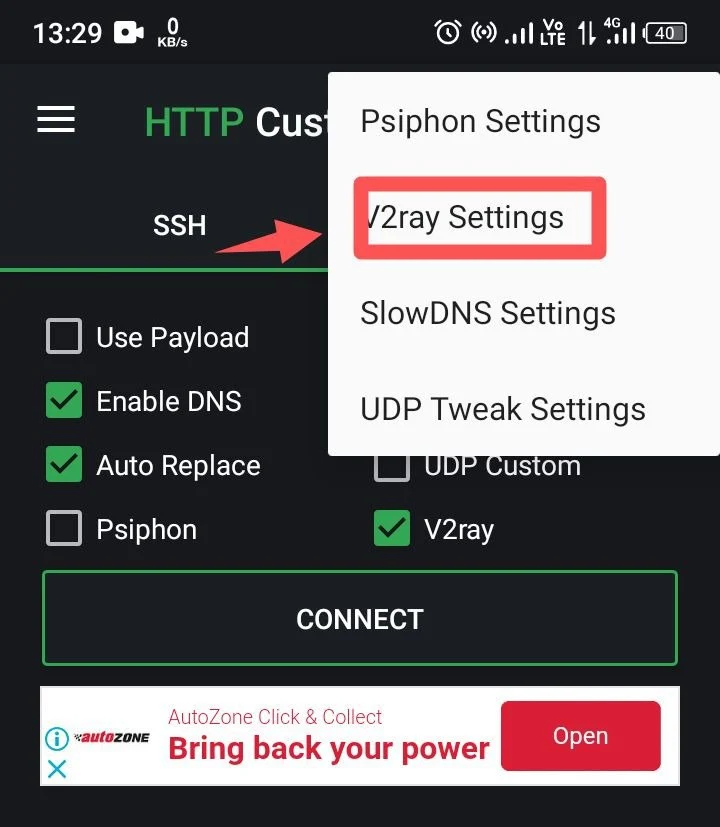
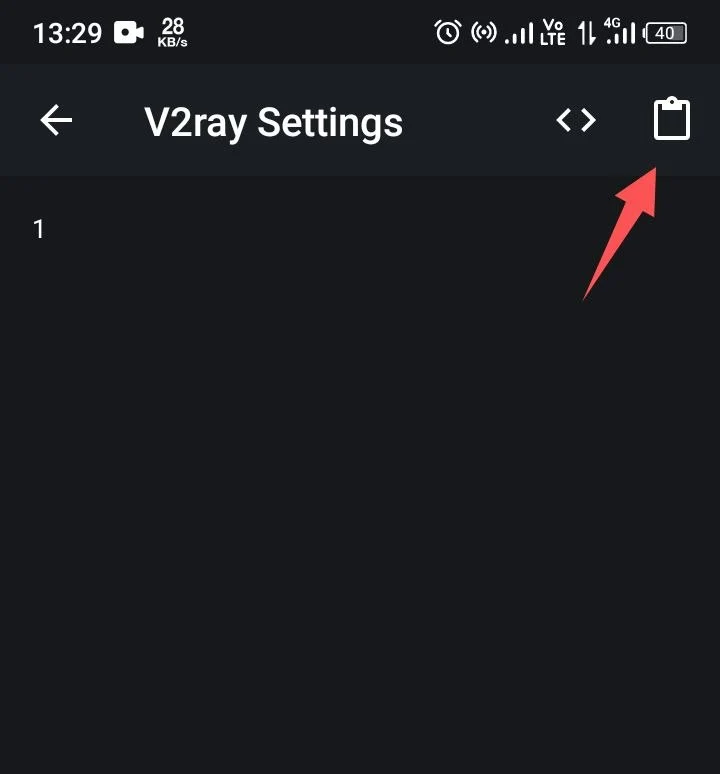
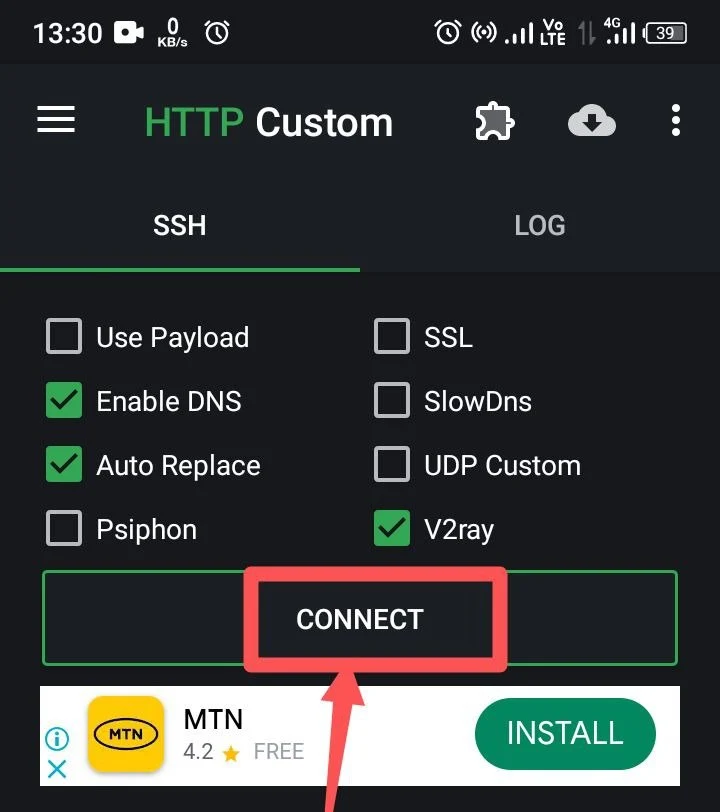
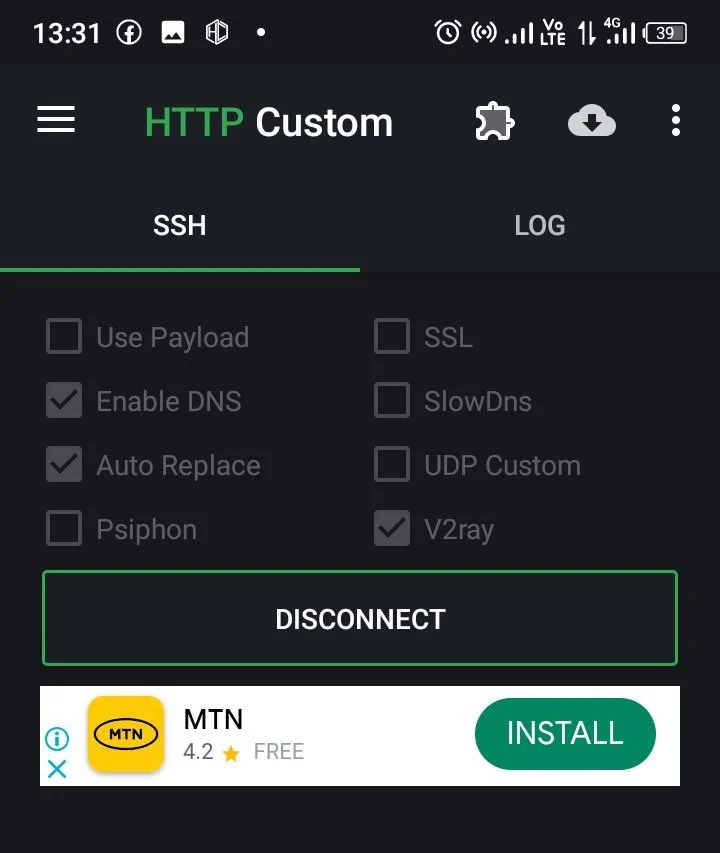
The app will display the configuration settings. Go back and click “Connect.” You can check the log to monitor your progress. Once you see “Connected,” you’re all set to use V2Ray on HTTP Custom.
Conclusion
Congratulations! You’ve successfully configured V2Ray with HTTP Custom, enhancing your online privacy and security. We hope this step-by-step guide has been informative and helpful in setting up your V2Ray connection. If you have any questions or encounter any issues during the process, please don’t hesitate to leave a comment below. Our team is here to assist you.
As you start using V2Ray for secure and private internet access, remember that your online safety is in your hands. Stay vigilant, keep your configurations up to date, and enjoy the benefits of a more secure online experience.
Don’t forget to explore the various possibilities and customization options that V2Ray offers to tailor your connection to your specific needs. We’re committed to providing you with valuable information and tutorials to enhance your digital life.
Thank you for reading this guide, and we look forward to sharing more useful insights and tutorials with you in the future. Stay safe and secure online!

