Creating TLS Tunnel files for free internet has never been this simple, with today’s tutorial you will learn everything required to create the files and you will also be provided with a free SNI bug host for your country.
Table of Contents
ToggleWhat is TLS Tunnel and How does it work?
- TLS Tunnel serves as a free VPN solution engineered to transcend the barriers imposed by internet service providers and governmental restrictions. Its primary mission is to ensure users’ privacy, freedom, and anonymity.
The core of TLS Tunnel operates through a proprietary protocol known as TLSVPN. This protocol offers a straightforward yet robust mechanism to safeguard connections by utilizing TLS 1.3 (with an optional fallback to TLS 1.2), akin to the encryption utilized by HTTPS websites. The connection is fortified by a self-signed certificate, validated during the connection initiation to thwart interception attempts.
Create TLS Tunnel files in 2024
Step 1: Downloading TLS Tunnel
Creating a file in TLS Tunnel is surprisingly straightforward. All you need is the TLS Tunnel application, which you can download easily from the Play Store or via the link below
Step 2: Generating SNI Bug Host
Click the link to generate the SNI bug host
- Click on select your country
- Select your country and click on generate
- copy one of the provided SNI
Step 3: Creating the TLS Tunnel file
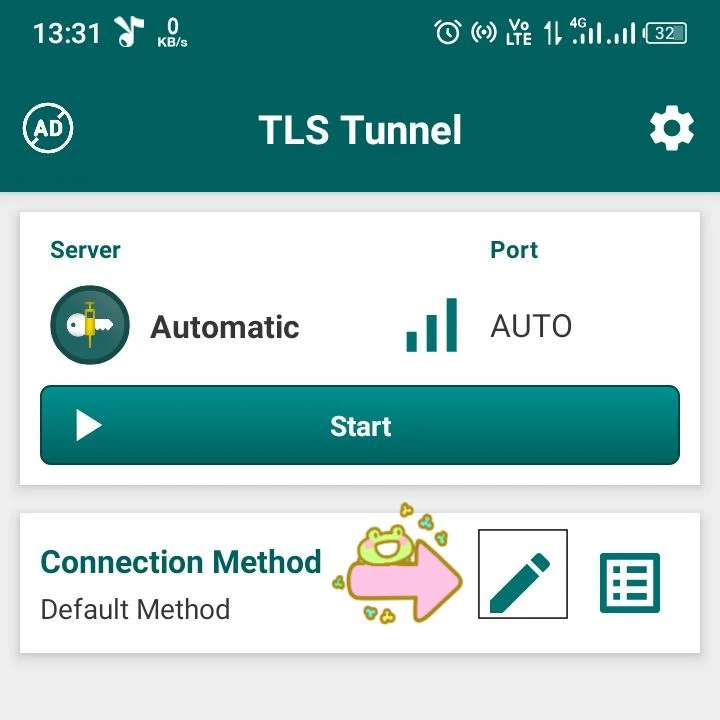
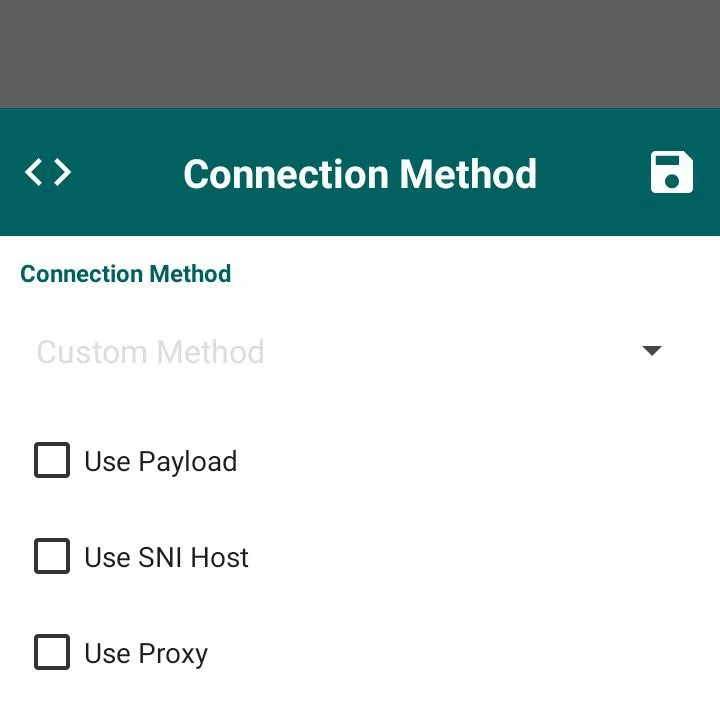
Now that you have your SNI Bug host copied, open the TLS Tunnel application. Scroll down and select “connection method.” then select Custom Method Here, you’ll find several options to explore. Let’s break them down:


Using Payload:
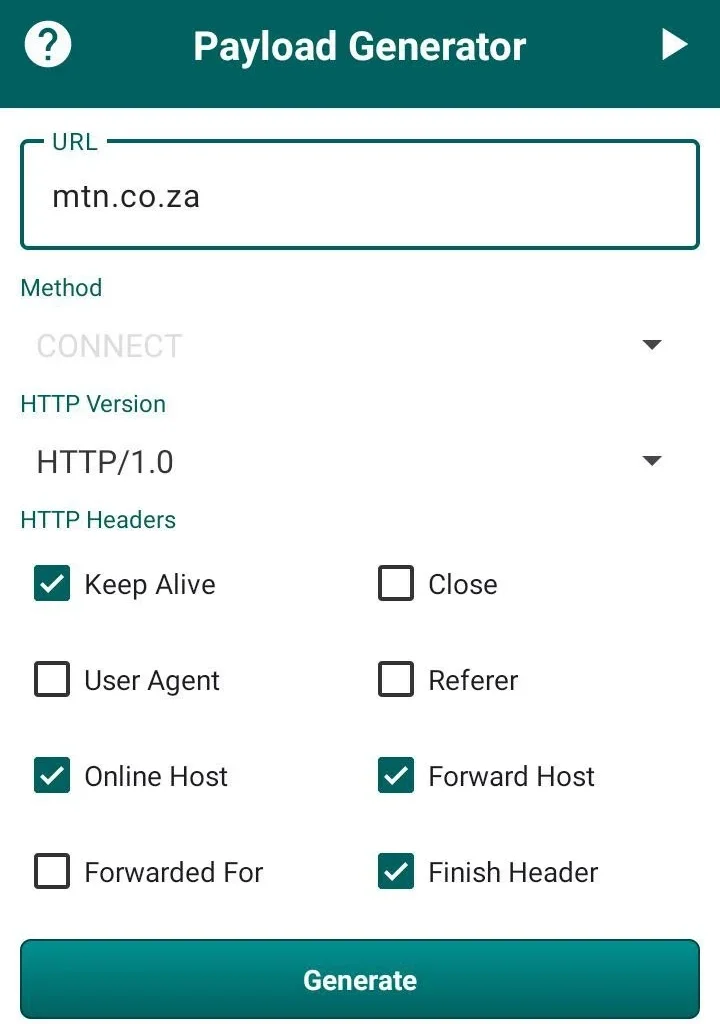
- Paste your payload and SNI bug host.
- Change the method to “connect.”
- Leave the HTTP version as is.
- Select “keep alive,” “online host,” and “forwarded for.”
- Generate your payload, apply, and save. Then, hit start to connect.

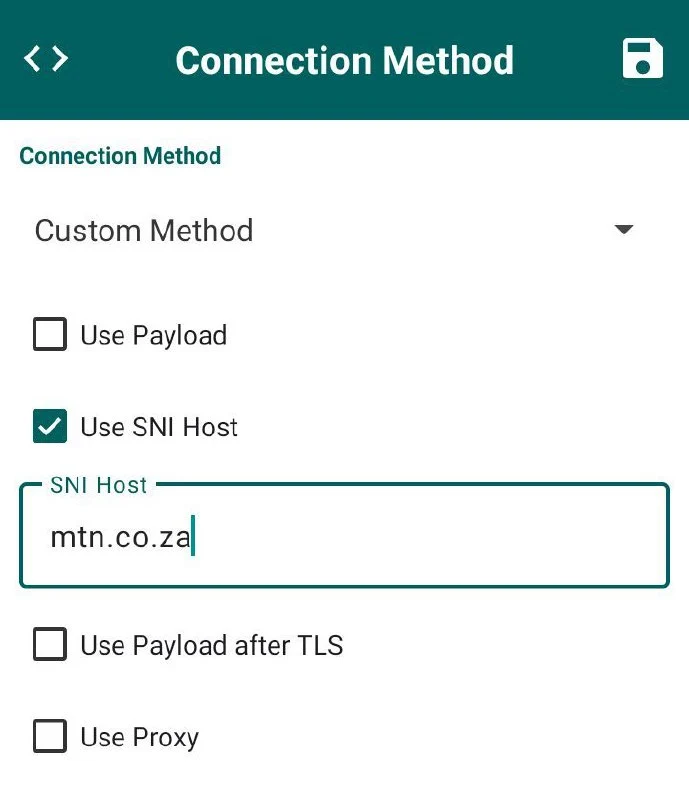
Using SNI Host:
- Simply paste your SNI bug host.
- Save and connect.

TLS Tunnel even provides pre-built SSH accounts, eliminating the hassle of creating your own. Just select from the provided servers based on your preferred country.
You can also combine payload with SN P host or use a proxy for additional flexibility, but for simplicity, utilizing the provided SN P host suffices.
- If one method doesn’t work for your SNI, don’t worry. Try the others, or request an update for your country’s SNI via our Telegram group
Video tutorial
Additionally, TLS Tunnel provides the option to utilize personal servers via SSH (known as the Private Server option). This can be achieved through the standard method utilizing port 22, or employing connection text and SNI if the server is configured to accept such connections.
- While official servers facilitate the passage of any IPv4 protocol, private servers accessed via SSH only allow TCP traffic. For UDP traffic, the server must be equipped with a UDP Gateway like badvpn-udpgw. Lack of UDP connectivity may impede online gaming or access to specific services. By default, communication between users sharing the same server is disabled to mitigate security risks.
We hope this tutorial was helpful. If you found value in it, give us a thumbs up, drop your questions or suggestions in the comments, and don’t forget to subscribe for more insightful content.
Until next time, stay safe and connected. Peace out!


