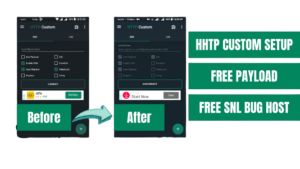
Creating KPN Tunnel rev files for free internet is very simple, in today’s tutorial we will walk you through the process of creating KPN Tunnel rev files, and also provide the SNI bug host for your countries so that you can access the internet for free.
Understanding KPN Tunnel Rev:
- KPN Tunnel Rev is a free VPN application available on the Play Store, offering a range of connection methods, including direct proxy, direct SSL, HTTP proxy, SSL proxy, and SSL proxy plus HTTP proxy. However, for the purpose of this tutorial, we’ll focus on the direct SSL and SSL proxy methods.
Creating KPN Tunnel Rev files
Step 1: Setting Up an SSH Server and Payload:
To set up the KPN Tunnel Rev application, you first need an SSH account. Follow these steps:
- Open your web browser and visit SSHOcean.
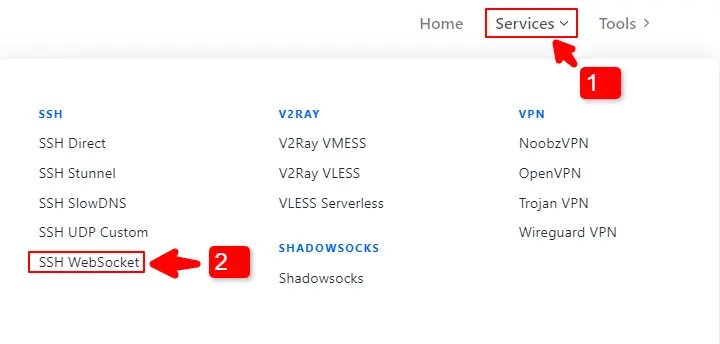
- Click on the notification bar, then select “Services,” and finally choose “SSH Web Socket.”
- Scroll down, choose your country, and click on “Select Server.”
- Find an online server with remaining accounts, click “Create,” and complete the CAPTCHA.
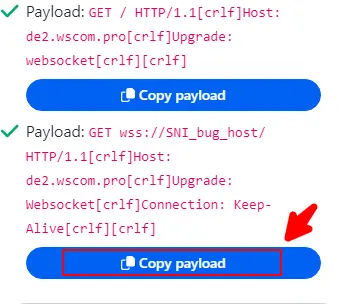
- Copy the second payload
Step 2: Acquiring SNI Back Host:
Click the link to generate the SNI bug host
- Click on select your country
- Select your country and click on generate
- copy one of the provided SNI
Step 3: Configuring KPN Tunnel Rev Settings
Open the KPN Tunnel Rev application click on the settings icon, then click on SSH Tunnel. fill in the following infornmation
- Host / IP [ put the SNI copied on step 2]
- Port [443]
- Username [use the username from the created SSH server on the SSHocean website]
- Password [use the password from the created SSH server on the SSHocean website]
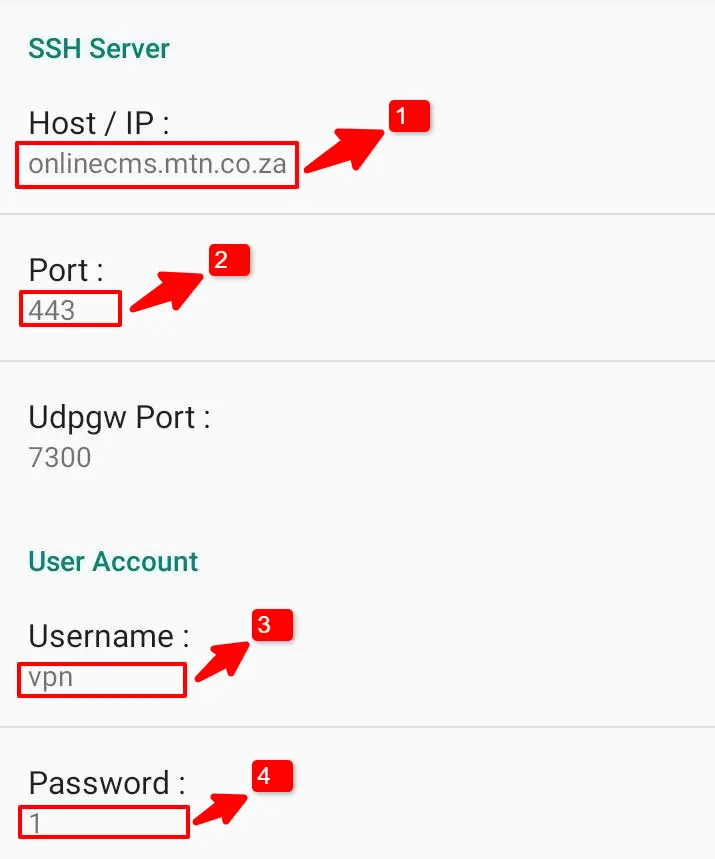
After filing the information above, go back to the home page
Step 4: Creating Files Using Direct SSL Method:
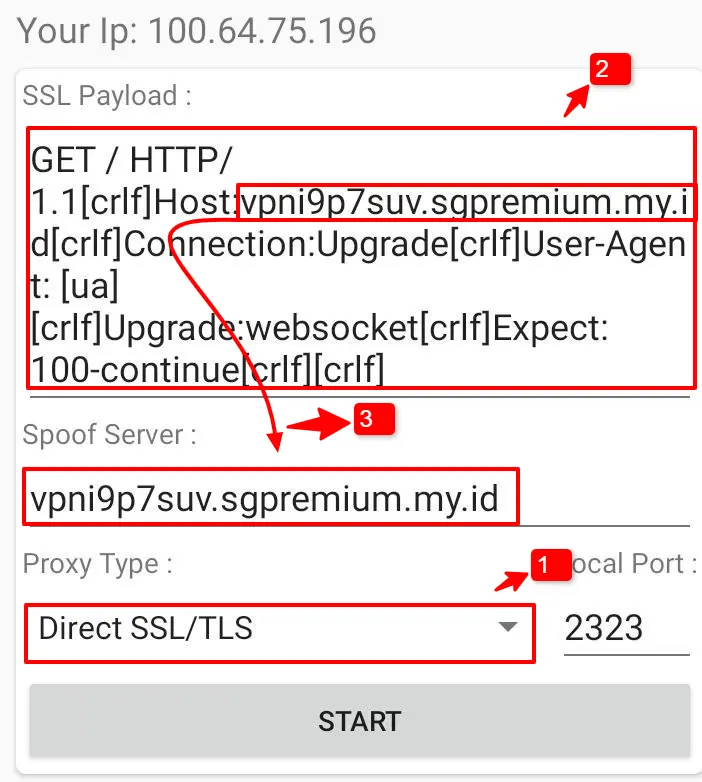
- Select the direct SSL connection method within KPN Tunnel Rev.
- Paste the copied payload and proceed.
- Copy the server name from the payload and paste it into the designated field.
- Initiate the connection by clicking “Start.”
Step 5: Creating Files Using SSL Proxy Method:
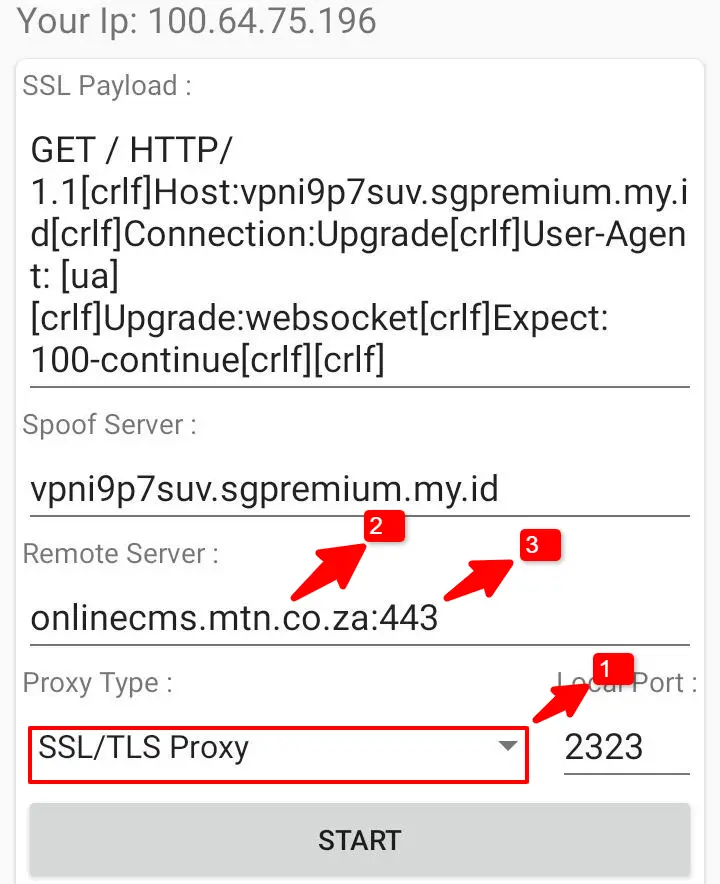
- Switch the connection method to SSL proxy within KPN Tunnel Rev.
- Paste the SNI bug host in the remote proxy settings.
- Enter the port (usually 443) and your SSH server credentials.
- Click “Start” to establish the connection.
Advanced Tips and Optimization:
Experiment with different connection methods and servers to optimize performance and security. Regularly update your SSH server credentials and SNI back host for enhanced protection against potential threats.
Video Tutorial
Conclusion:
By mastering the creation of KPN Tunnel Rev files using direct SSL and SSL proxy methods, you can navigate the digital landscape with confidence, ensuring privacy and security in 2024 and beyond. If you found this tutorial helpful, consider liking the video, leaving comments for any queries or suggestions, and subscribing to our channel for more insightful content. Embrace the power of KPN Tunnel Rev and stay safe online!
Share via:
